It happens… eventually. We can’t help it. Most kitchens will need updating at some point or another. Just the mention of updating your kitchen can bring dollar signs to your mind and a rapid heartbeat to your chest. Unless “unlimited funds” is something you can claim, most of us find ourselves looking for an affordable way to keep our homes up-to-date. Whether you are wanting to stay on top of the trends or get your home ready for resale, there are affordable ways to keep it current. Realtors say the two areas people look at first are kitchens and bathrooms. Sounds like the best place to start!
We want to share five affordable ways to update your kitchen, the hub of the home.
ONE: Refinish Your Cabinets
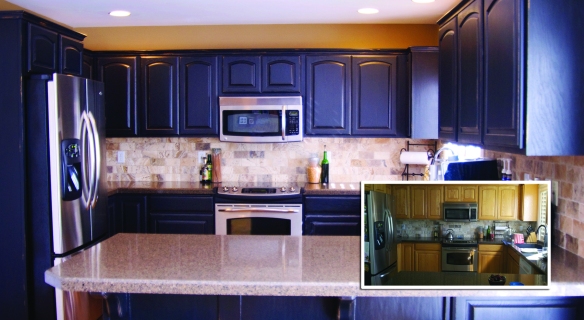
Oak cabinets with a facelift of a custom Graphite blend.
Repainting your cabinets may seem like a huge undertaking, but you save 1/2 – 2/3 what you would spend on replacing your cabinets! Older cabinets are also generally made with real wood and not pressed board. As long as your cabinets are in good shape, a facelift will often suffice for an update. Not to mention, painted cabinets are the “hot” trend right now. When Artworks does a custom kitchen finish we use only the highest quality paints for durability. These products are specifically designed for cabinets and furniture as opposed to general wall paint, therefore they are light-fast and non-fading.
The finishes available to you are almost limitless. Between color, technique, and cabinet style – no two jobs are alike! We have transformed golden oak cabinets to cherry with water based stains that do not require sanding. We have added texture to create dimension and detail, transforming ordinary, plain cabinets into unique pieces of art. We can transfer images (even your own photographs) onto the surface, then stain or glaze to truly customize your cabinet doors. There are options that include metallic foils, paints, glazes, waxes, and plasters. From french country to ultra modern, there is a solution that is just right for you. Your cabinets can be the focal point to a perfectly stunning kitchen for a fraction of the cost of new cabinetry.
Our studio is full of cabinet and furniture finish samples. Let us help you figure out the product best suited for your desired finish.
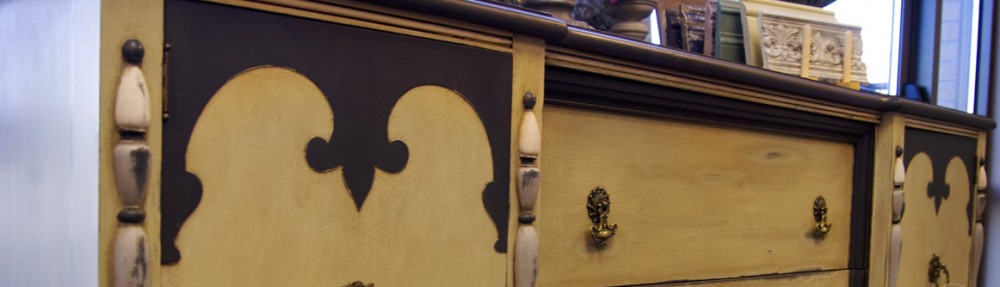
These cabinets got some extra love! Old White covers the Golden Oak and Provence was used to embellish the detail of the doors. The PERFECT hardware was found and installed to complete the look. Although you can’t see it – the island was done in contrasting fashion. The base is Provence.
I told you! This hardware was practically MADE for these cabinets. Sometimes the perfect find seems almost custom!
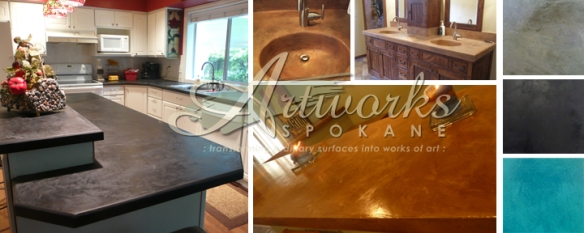
TWO: Resurface Your Countertops
There are so many options for your countertop. You may find yourself overwhelmed with all the choices, lingo, and cost comparisons. Laminate, Granite, Tile, Silestone, Corian, Marble, Man-Made Composite countertops, Concrete – each one has it’s strengths and weaknesses, it’s purpose and attraction. We have done our research to guarantee we know the benefits and limitations of each one. Our specialty is with concrete overlays. We offer the following concrete options:
SkimStone™ – a hybridized Portland cement that is troweled directly onto your surface. This product is very thin and can go over old or new substrates when properly prepared.
SkimStone Countertops: This product goes over tile, laminate, concrete, corian, new substrate, etc.
DesignerTops™ – highly engineered concrete overlays for incredible bonding to both existing and newly fabricated countertop and vanity surfaces.
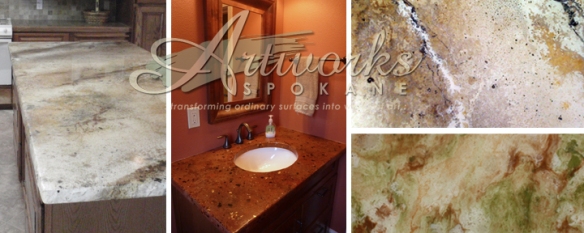
DesignerTops countertops have options other overlays cannot provide – glass pieces, stone, mica flecks, etc. embedded into the surface.
Formed Concrete – Using concrete specifically designed for “poured in place” fabrication, these countertops are constructed on-site, making for a seamless countertop.
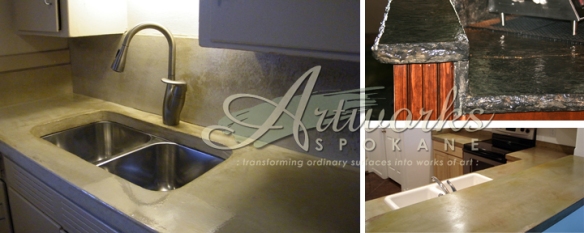
“Poured in place” concrete countertops offer a contemporary look with seamless installation.
In order to keep from writing a novel about the differences of each surface (including the surfaces you are more familiar with) I will compare just one aspect of each of these surface options: color/artistic freedoms – the ability to control/manipulate color.
Granite: No – color and grain can differ from sample, it is best to choose at the stone yard.
Ceramic Tile: Sort of – it comes in many colors and patterns. As for artistic pattern – many things can be embellished and customized. There is also the possibility of mosaic.
Solid Surfacing: Sort of – it also comes in many colors and styles, including those that mimic concrete and stone. Stone finishes can look more uniform than natural.
Laminate: Sort of – this also comes in a variety of colors and patterns.
Now for the products we specialize in:
SkimStone™: Yes – this product can mimic venetian plaster and stone looks, endless patterns, textures, stenciled or hand-painted designs – the possibilities are endless. With 90 standard color and shade options we can create custom colors by layering colors and tints.
DesignerTops™: Yes – the design possibilities are unlimited! Unlike Granite your color options are endless enabling you to customize your countertop to the surrounding room – not the other way around! You can also have more depth, texture, and movement with the addition of glass pieces, rocks, mineral flakes, etc. Achieve a very high end look without the cost!
Formed Concrete: Sort of – The artistic limitations with this are bound by forms, stamps and product base color. There is a white mix and a grey mix, both of which can be dyed or textured.
With a concrete overlay you can go right over your existing countertop, as long as your countertops are secure and not falling apart. Decorative Concrete Overlays are a very affordable solution to updating your counter. The options can look like concrete, granite, marble, stone, etc. The formed concrete countertops require more prep in removing the existing counter and building a form onsite. For more information on each of the products listed above, download our comparison sheet.
And as with the cabinet samples, we have hundreds of concrete countertop samples to view in our studio. We also pride ourselves on custom sample boards before we begin your job.
Don’t be overwhelmed or settle for what you think are your only options. We are happy to walk you through the design process and give you a countertop you’ll cherish (or be proud to put on the market).
THREE: Restore Your Floor
Imagination is the only limitation when it comes to your kitchen floor.
Your floor is another surface that can make or break your room. There are limitless possibilities for restoring your floor: tile, hard wood, linoleum, laminate… we offer several options that are quite affordable AND unique: concrete overlays, acid finishing, marquetry staining, concrete polishing, epoxy coatings, and paint.
Concrete Overlays: These floors are seamless, custom, and quite contemporary. The product can go over radiant heat and many existing floors. We use two products when finishing a floor with concrete – SkimStone™ and Elitecrete™. The color and stenciling options for SkimStone™ are limitless. Elitecrete offers more texture and a different approach for coloring.
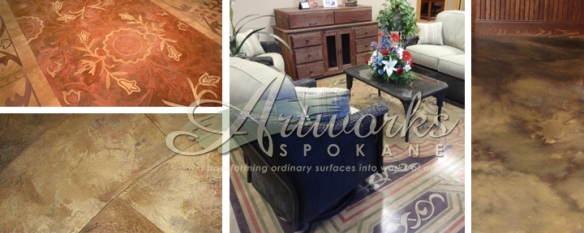
Concrete overlays can be neutral or focal – they can cause the floor to “disappear” or POP.
Acid Finishing: This technique is done to an existing concrete floor or over a new concrete overlay. The concrete can be troweled with texture or smoothly to give you the look you are going for.
Acid stained floors have subtle movement and are one of a kind.
Marquetry Staining: Marquetry: (n) Inlaid work made from small pieces of variously colored wood or other materials.
This technique is a great way to take a new or existing hard wood floor and make it a focal point. With stencils and wood stains this process can make your hard wood floor look as though it has marquetry patterns and embellishments at a fraction of the cost!
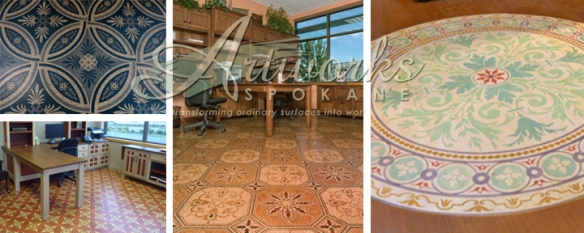
Marquetry can be done on wood and cork.
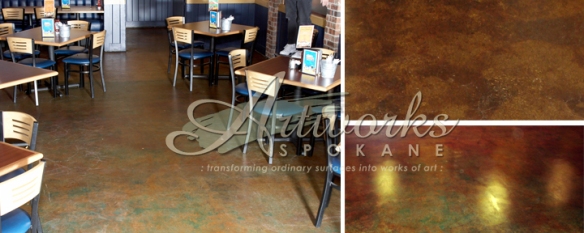
Concrete Polishing and/or Dye Stains: This is another option for existing concrete floors. Most people don’t realize when concrete is polished it brings out the beauty of the aggregate and the unique features in each pour. The finished product is honed and compacted to such a high degree it is virtually stain resistant and maintenance free. The look is modern and clean.
Polished concrete has a beautiful sheen – adds the feel of quality. The color from the dye stains in this yogurt shop gives character and charm.
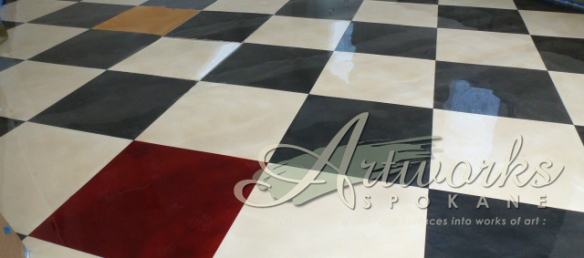
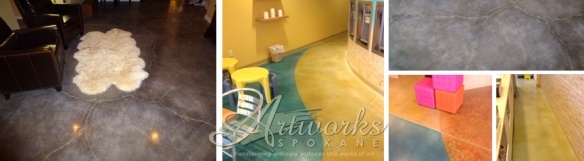
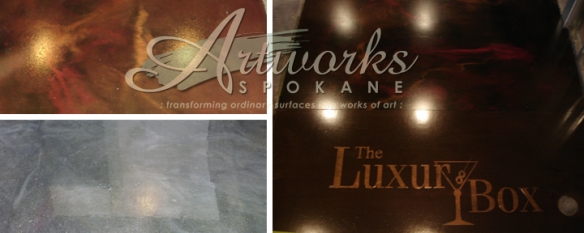
Epoxy Coatings: This technique is pictured in the beginning of the kitchen section (the checkerboard floor). Epoxy coatings are extremely durable, seamless, and have a myriad of design options! There are additives that can be added to the epoxy to give it shimmer and texture. Colors are swirled together or solid. Patterns can be implemented as well as designs, typically done underneath the layer of epoxy. The end result is a smooth glossy finish.
Epoxy Coatings bring interest and depth.
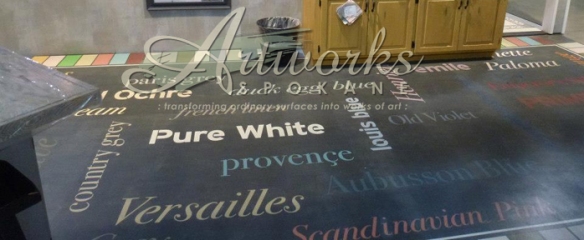
Chalk Paint®: This option for flooring has gotten a bad rap. If done improperly it can be devastating to have it wear off so quickly however, when done correctly and with the proper sealers the result is fantastic and it doesn’t get much more affordable. If your floor is in good shape, you just want a change, you can paint a new design. Chalk Paint®, Annie Sloan’s paint adheres to most surfaces without priming or sanding! Imagine your favorite image as one large graphic on your kitchen floor, or a border with solid colors. This option opens endless possibilities.
A floor painted with Chalk Paint®. Sealed with three coats of Lacquer for durability. This floor cloth has weathered three Home Shows.
FOUR: How to Select Quality Products and Training
“I’ll just run to Home Depot/Lowe’s/Ace and get myself some stuff to do this.” Avoid the temptation! The products we use are specifically designed for superb performance and quality finishing. Run to Artworks. We can educate you on the products. We also offer workshops to train you how to finish most all of these surfaces. With so many products available to you it is easy to become confused and overwhelmed. We often have customers that come to us after something has gone wrong – discoloration, delamination, failure to cure, undesirable end color or result. We listen intently and guide each one in a direction that will provide them the results they desire! Sometimes we are handed the job to correct, but often our clients love doing it themselves and simply need some direction and knowledge. If you are getting ready to start a project and want to make sure your techniques and products are best for the desired end result, feel free to stop in. One of our artisans will be happy to hear your game plan and make any suggestions as for product.
FIVE: Why use Artworks Spokane
Why should you hire Artworks to complete the job? There are so many reasons! Let me count the ways!
1) We are artists first, contractors second.
2) We love color and design.
3) We notice texture, fashion, trends, and color theory.
4) We pay attention to details, balance, and flow.
5) We think outside the box.
6) We love a challenge.
7) We thrive on transforming ordinary surfaces into works of art.
8) And finally, we crave this work. It is our passion and drive to make your vision a reality.
Most of us don’t want to take the time to invest in an update ourselves. And when we do tackle something of this nature we definitely don’t want to waste our time doing it over or repairing mistakes. The time it takes me to chop an onion is much greater than a trained chef (and it isn’t uniform – how do they do that so quickly AND keep all their fingers in tact, anyway?). The same goes for anything, really. When you are trained and practiced at your craft or passion, it comes quickly, efficiently, and with ease. Will it cost you more to have someone come and do the work for you (any work)? Probably, yes… most of the time, yes. Will you be thrilled with the end result? We guarantee it! We know what we’re doing and do it quickly, correctly, and beautifully.
What is your return on investment? Your time. Your peace of mind. Your satisfaction. We understand the chemistry of our products – what to mix and what to avoid mixing. When you hire Artworks Spokane you can be sure we will take the time to make your vision a reality. Leave it to the pros. You won’t be sorry.

Artworks Team of Artisans will make your vision a reality.
47.673228
-117.239375